Sunday, August 2, 2015

Free Knit and Crochet Drink Cozy Patterns

I love making cozies. 

Like, to a weird extent. 
I've made cozies for all my water bottles (and my nephew's water bottle). I've made them for my regular drinking glasses.
My favourite cozies to make, though, are the ones that you carry in your bag and use when you stop at a coffee shop or something. The ones that replace those cardboard sleeves. I always carry two in my purse - one for me, and one for my husband (though he's not the biggest fan of using them. I pretty much have to force him into it).

These drink cozies have become my favourite thing to knit, by far. They're super easy and super fast. They make really cute gifts (hence why you should always carry a few around with you - if you meet up with some friends and they go all ga-ga for yours, you can quickly gift them with one of their very own!). They're how I learned to use double pointed needles (and found out that I strangely really love using dpns). They're how I learned to do a stretchy bind off (after trying a regular bind off and being disappointed that it didn't stretch even a little bit). They're how I fell in love with Marblz Knitting Needles (which are so hard to find - only one store I know of in my area carries them). 
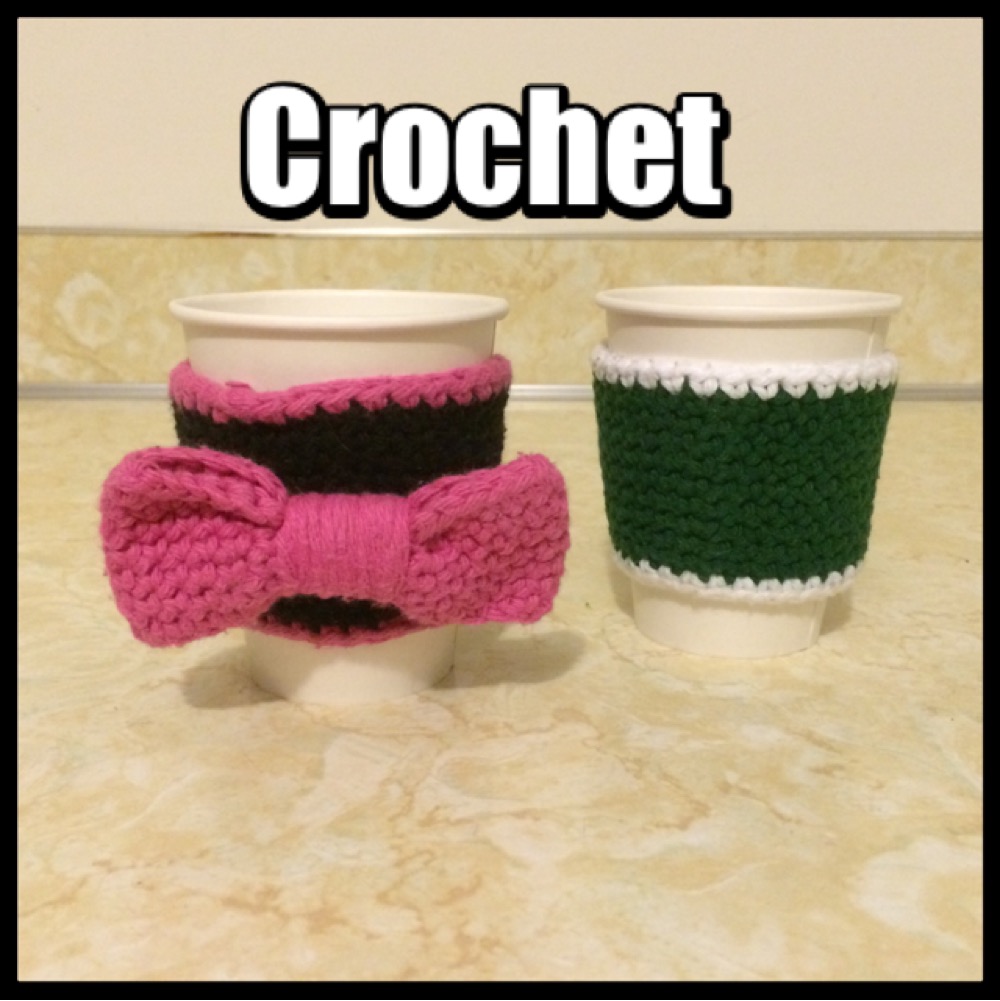
The crochet version of these cozies also hold a special place in my heart. They're the first pattern I ever wrote myself. I made them for all my coworkers one year for Christmas - I gave them empty coffee cups filled with candies and a gift card, then just slipped the cozy over the cup. They loved them, and I ended up selling a few to other people who saw them. Score! The only reason I don't really make them anymore is that they don't stretch like knit does, and thus they're not as user-friendly.

So I figured I'd share my patterns with you. They're incredibly easy and perfect for beginners. They're also super nice for when you want a super fast and useful project. They also make GREAT stash buster projects!!


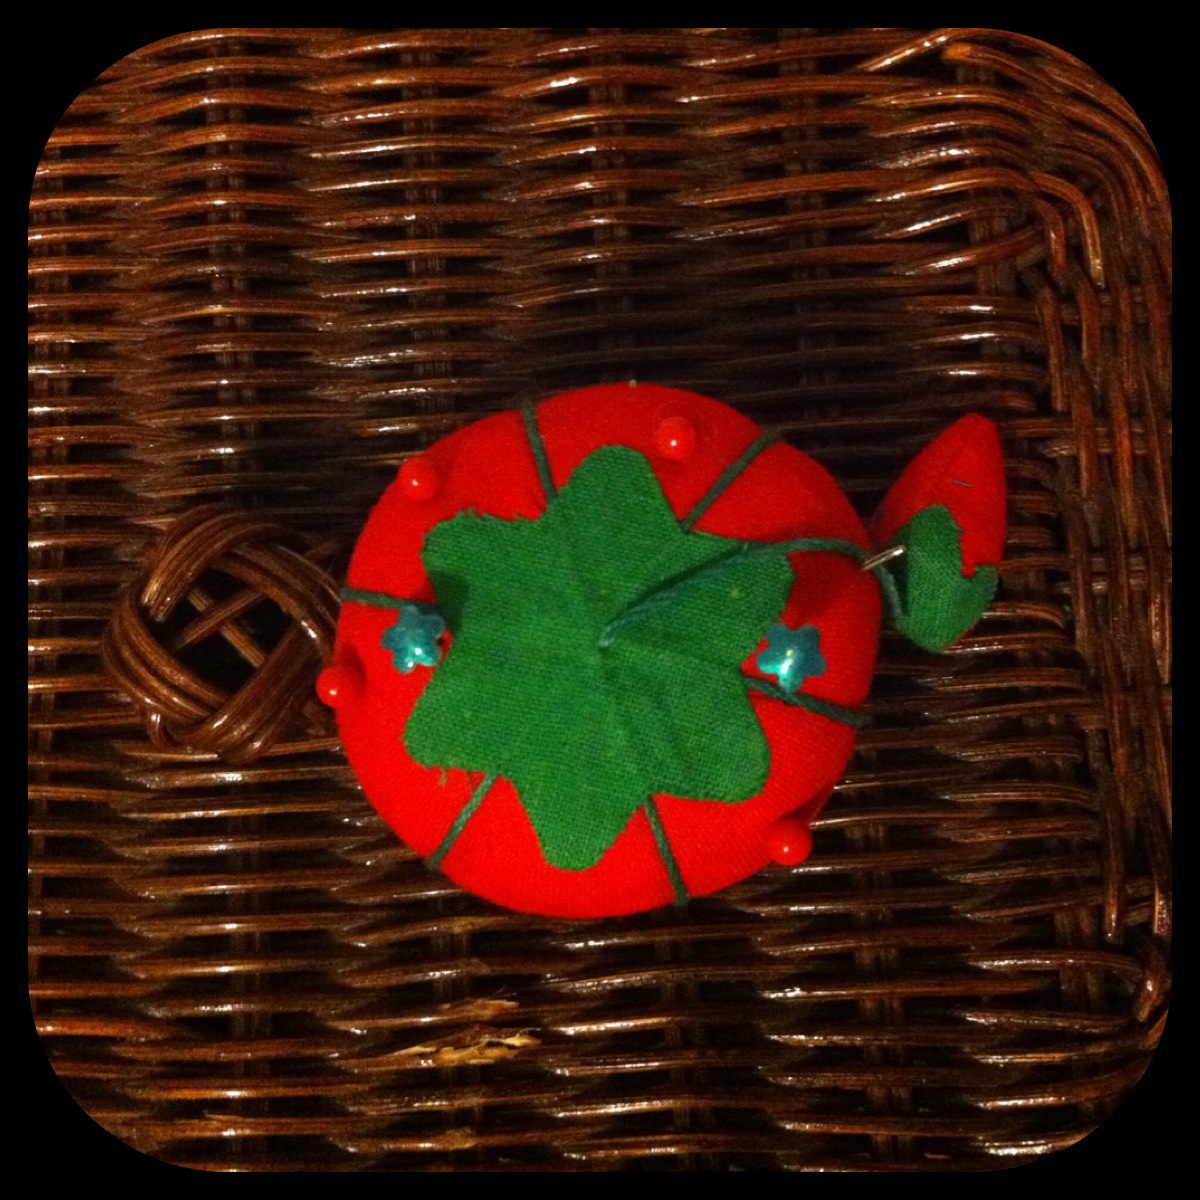
As you can see, you can add all sorts of embellishments onto these cozies - buttons, patches, felt shapes, knit or crocheted appliqués, flowers, whatever! Be creative!! 


For these, I used Sugar n' Cream cotton yarn and a size G hook.

1. Ch 32 and connect to form a circle. Make sure there are no twists!
2. Ch 1. Sc in every ch stitch. Slip stitch into your ch (32 sts).
3. Ch1. Sc in every sc stitch Slip stitch into your ch (32 sts).
4. Ch 1. Sc into 10 sc stitches. 2 sc into the next stitch. Sc into each stitch after in the round. Slip stitch into your ch (33 sts).
5-6. Ch 1. Sc into every sc stitch. Slip stitch into your ch (33 sts).
7. Ch 1. Sc into 20 stitches. 2 sc into the next stitch. Sc into each stitch after in that round. Slip stitch into your ch (34 sts).
8-9. Ch 1. Sc into every sc stitch. Slip stitch into your ch (34 sts).
10. Ch 1. Sc into 30 stitches. 2 sc into the next stitch. Sc into each stitch after in that round. Slip stitch into your ch (35 sts). Knot your yarn and weave in ends. 
If you want a contrasting border
With your second colour, sc into each ch stitch in row 1. Knot your yarn and weave in ends. 
Then sc into each sc in row 10. Knot your yarn and weave in ends.

EASY PEASY, RIGHT?!
(If you have questions, feel free to ask! I'm still not used to writing patterns!)


The knit pattern is even easier. Since it stretches, there's no need for increases. 
I usually use Caron Simply Soft yarn (or really whatever DK yarn I have on hand) and size 9 dpns. 

Cast 32 stitches onto a size 10 straight needle. Divide those stitches evenly onto four dpns (8 stitches per needle).
Knit 30 rounds, or until it's big enough for your hand.
Bind off with a size 10 straight needle (again, I recommend [url=http://slipslipknit.com/?page_id=92]this[/url] bind off method). Knot your yarn and weave in ends. 
This pattern creates rolling edges (like you see in the blue cozy). If you'd prefer them straight, purl rows 2 and 29.


Now go out and show off your new cozies! Show them to the world, and enjoy hands that are neither too hot nor too cold while you enjoy your beverage! 
Until next time!

Sunday, July 19, 2015

Pattern Review: Crochet Mesh Grocery Tote

I spent this past weekend babysitting my 6 year old nephew and 3 year old niece. 
My brother wanted to take his wife on a weekend trip for their 10 year anniversary, so I stayed at his house and took care of two little kids (mostly) by myself for about 48 hours. 
It was exhausting, but I'd do it again in a heartbeat.
Those two are really good kids, and we had so much fun doing Avengers training (obstacle courses), movie nights (now I have songs from Cinderella stuck in my head), and "cooking" (they have the best collection of play food I've ever seen). Super fun. :-)
Leading up to this weekend, I was trying to think of fun things to do with them. I wanted to do sun-print paper with them, but the store was sold out of it (noooooooo). I brought my baseball glove, but with the heat we didn't even go outside. But I did bring one winner.
Crochet bags. 


Who knew kids would get so excited about crocheted bags? I had originally planned to take them to the library, and the kids could use these to bring home all their books. I handed my nephew his and he said "Wait, these are ours to keep?!" Goof.
They used them all weekend to carry around books, stuffed animals, play food, all sorts of things. They even just snuggled with the bags like a blanket for a little bit. I had put a colouring book in each, but the bags themselves were way bigger hits than those.
Nice.

So I figured I'd share the pattern I used for these bags, in case anyone else needs a quick and easy gift for easy-to-please kids. I've also given this bag as a gift to my mother - I have two of them, and was using one around her, and she loved it. They work so well, and you can fit so much stuff in it since it stretches like crazy. I've used mine as market bags, baseball-gear bags, beach bags, craft supply bags, and probably others that I can't think of now.


I used this market bag pattern from Just Be Crafty. I found it on Pinterest, tried it, and it quickly became my favourite bag pattern. I use standard Sugar n' Cream cotton yarn so that they're easy to clean.

To make different coloured handles, I switch colours at row 36.
To make kid-sized bags, I skipped rows 17-24. To make a long handle (for a messenger-style bag), I just rows of 5 hdc until I got the length I wanted, and slip stitched it to the opposite side of the bag. 
Easy peasy!

That's really all I've got right now. I'm still pretty tired from this weekend, so this post is going to be a little short. 
Until next time! :-)

Saturday, July 11, 2015

Blackberry Banana Bread Recipe (or B³ Recipe)

I love picking berries.
Like, a lot.

When we moved to our apartment in the city here two years ago, I was so excited to see blackberry bushes by our parking area. It was such a treat to pick a few and snack on them whenever we'd get into the car. I never went out and actually picked a bunch of them, though.
Until now. 


Look at all those berries! 

I had a banana on its way out in the cupboard, and I needed to do something with it quickly. I could use it to make my Banana Chocolate Chip Cookies, but my husband isn't always a fan when I "mess with the classics," especially when it's his precious Chocolate Chip Cookies. 
BUT TOO BAD, because if there's one thing I love more than berry picking, it's experimentation when I bake.
So why not try to mix these berries with my banana?
Naturally, this line of thought led to....


Yum, yum, yum! It's so good, and the berries are so tart and juicy - so perfect! 
I only used two bananas in it, one of them being green (I couldn't wait for it to turn), so the banana flavour is very slight, but I think that's good - it doesn't overpower the berries. I had made Banana-Pineapple Bread about a year ago, and you couldn't taste the pineapple for all the banana. Such sadness.
Since this was a winner, I decided I'd share it with the world! THE WORLD NEEDS TO KNOW OF THIS DELICIOUSNESS. I adapted the recipe from my standard Banana Bread recipe, which I adapted from one I found in one of my random cookbooks (I rarely use the recipes in cookbooks without fiddling with them somehow). So here you go!

Blackberry Banana Bread

2 cups all-purpose flour
1½ tsp baking powder
½ tsp baking soda
¼ tsp salt
¼ tsp ground ginger
¼ tsp ground cinnamon
¾ cup granulated sugar
¼ cup firmly packed brown sugar
½ cup melted butter
2 eggs
1 tsp vanilla
2-3 mashed bananas
1-2 cups blackberries

Preheat the oven to 350° and grease a loaf pan.

Mix the flour, baking powder, baking soda, salt, ginger, and cinnamon in a medium bowl. Set aside.

Mix the sugars, butter, eggs, vanilla, and bananas in a large bowl. Slowly add in the flour mixture and combine (I use the Alton Brown ⅓ method - add in ⅓ of the dry ingredients at a time). Mix until moistened, but don't overmix. The batter will be lumpy.

Fold in the blackberries. You can get a little zealous here, since blackberries are so fragile. The more you mix, the more the berries will break up, and you might end up with a swirly bread - still delicious, I'm sure!


(This is as swirly as mine got - not too much)


Pour the batter into the prepared loaf pan and bake for 55-60 minutes, or until a toothpick inserted into the center comes out clean. Allow the bread to cool outside of its pan.


This bread is so tasty, I keep having to stop myself from eating it all! I haven't even had it with butter yet, but I really need to.

Of course, there was unintended misery that came with this bread. We live in an attic apartment, so in the summer it gets hot. 
Like really hot.
There is only one window in the apartment that will hold an air conditioner, but that window is right next to a stairwell, so all the cool air just sinks down there. I really honestly don't even know why we turn the air conditioner on - I don't think it helps one ounce. We have fans, but they really just blow the hot air around if it gets too bad.
So having the oven on in the apartment rose the temperature in my apartment by about 5°, which is horribly miserable. 


75° outside.
83° inside.
Awful.
I get so bad when I'm too hot. I really just turn into a massive baby, whining and being generally crabby. It irritates me so much to be sweating like crazy when all you're doing is sitting on the couch. That's why as we look for a house, my husband and I refuse to even entertain those that don't have central air. Bleh. 

In any case, I hope you enjoy the bread!! Until next time! Stay cool!

Saturday, July 4, 2015

DIY Woven Crocheted Bath Mat

HAPPY INDEPENDENCE DAY!!

And to my beautiful neighbours to the north:

HAPPY (belated) CANADA DAY!!

I hope everyone has stayed safe but still partied their little patriotic hearts out!! I'm currently writing this while I listen to the fireworks that have been going off in my city for at least five hours (who starts shooting fireworks in daylight?!). My apartment is starting to smell a little bit sulphurous (all my windows are open since I don't have AC), and my head is starting to hurt, but what're you gonna do? My kitties are a little stressed out, but they're making do. Here's sending good thoughts to your own pets (if you have them) - fireworks can be so stressful for animals. 
Poor little guys.

Anyways, I have lots of things to report, including a little tutorial! 
First, I want you to look at my knitting bag, because it makes me laugh all the time. 


My mom and I went to an estate sale a few months back, and I laughed so hard at this that she bought it for me.
The best part is it's machine embroidered, so someone programmed a kangaroo sitting on knitting needles into their embroidery machine.
Beautiful. I just love it.

Second, I finally got something that I've been wanting and searching for for months


Amazon is sold out of Johanna Basford's two colouring books every single time I look, and it was getting so frustrating. I finally walked by them at Barnes and Noble, though. I considered buying her other book (Secret Garden), but it seems to have more of an activity book-feel to it (there are several pages where it tells you to complete the drawings, and I'm just not comfortable enough with my art skills). This one is almost strictly colouring, and I LOVE it!! I've honestly been carrying it everywhere. My husband ran a 25k this morning (SO PROUD OF HIM), and I took this to the race and coloured while he ran. I even pulled out my Prismacolors from high school and was playing with those. 


I love blending. 
I will need some new coloured pencils soon, but everything I've been reading about Prismacolors since they started being manufactured in Mexico is pretty bad, so I may have to find a new brand. Any suggestions would be really helpful!! 
If you're interested in what people do with some of the pictures in Johanna Basford's books, I'd recommend searching just her name on Pinterest - people have done some really amazing things with her pictures!! They're so inspirational, even if I know I'll never make it to that level.

Okay, now the moment you've all been waiting for, I'm sure. The tutorial. 


I finally finished my crochet bath mat.
But bath mats are like $5 - why wouldn't you just buy one?
Good question! I don't like the bath mats you buy at the store because of their rubberized bottoms. That means that you can't wash it well in the washing machine, and it gets all mouldy and gross. I hate them so much. Plus my cat barfed on my last one, and so I've just been using a towel on the floor like a bachelor. 
So I decided that if I just crochet my own out of cotton yarn, I could machine wash it as much as I want! 
*Note: I actually have yet to machine wash it, so I don't know how it's going to work out. But I'm optimistic.*
Let's do this.

So I used a little less than four full balls of each colour of my cotton yarn. It's the 70.9g balls of Lily Sugar'n Cream yarn, and I'm pretty sure I got mine for really cheap at Michael's. The green colour I used is called "Sage Green," and the purple is "Hot Purple." What a weird colour name. 
My husband and I couldn't agree on the colours, so I just picked my favourite colour (purple) and his (green) and went with it. They actually look really nice together. 
You'll also need another ball for the border, but whether that's one of your main colours or a different one is up to you. I used a cream scrap cotton.


So I learned something about myself while I made this bath mat. 
Apparently, I'm not very good at following my own patterns. 
I thought I had all the measurements and everything down, but it all turned out wonky in the end. If you're trying to do this, I would go with the measurements system instead of the row counting one - I went with the latter, and, like I said, I don't know where I went wrong, but I definitely messed up. 


My goal was to make a bath mat that measured 27" x 18". I decided which colour would be my length strips (purple), and which would be my width (green). I made 6 purple strips that measured 3" x 27", and 9 green strips that measured 3" x 18". In the end, I only used 8 of the 9 green strips, but the mat still measured out to be 27" x 19.5". I don't know - if you do this just be flexible and remember that frogging is always an option (as per my last post). 
I double crocheted my strips (for speed), but you could certainly knit them or do a fancier stitch (I'm considering making a rug in a puff stitch because I think that would feel so good to walk on, but it would also use up A LOT of yarn).


Once I had all my strips done, I connected them by just single crocheting the ends together, as you can see in the picture. I connected all the purple strips at both ends, but the green only at one end (it actually made the weaving part easier, I think). 


Once all that's done, I placed my long strips on top of my short ones. 


Hooray for weaving!


Don't worry if the strips get a little scrunched (like my bottom row). Once they're all secured you can fix that really easily.
After I finished weaving, I single crocheted the open end of the green strips together. This part was a little tricky, but certainly not the worst thing I've ever crocheted. 


Once all that was done, I just took my cream scrap cotton yarn and single crocheted a border, going through both layers - the green and the purple - in order to secure them together. It doesn't look the prettiest, but I've always been more of a fan of functionality over looks in my crochet (which is really just my justification for not being very good, haha). If you wanted, you could do a fancy scalloped border or something - that would look cute. :-)
Once the border was done and I weaved in the last of my ends (which took no time at all, since I'm a big proponent of just crocheting on top of the ends), the mat was ready!
It's very absorbent, but also a little slow to dry, so be warned. Although, with it looking this cute, you could always hang it out on the line in the summertime and dry it faster (and the sun will help keep it clean, as well!). 
My husband likes it - he said it looked too good to step on.
I told him that I worked too hard on it for it not to be stepped on. 

Once I machine wash it (probably this weekend) I'll report back on how it held up. There's always that fear that it'll all come apart in the wash (at least I have that fear).  So until then, celebrate the summer holidays safely! 

Saturday, June 27, 2015

That was a really big frog

Do you ever grab your phone to check something, then as soon as you touch it you instantly forget what you originally wanted it for and end up checking half a dozen other things? Because I do that all the time.

Oh, I should check the weather. *grabs phone*
Shoot, I haven't done my French yet.
I haven't really checked my email all day.
I wonder what the Facebook world is up to.
And Instagram too, I guess.
That's enough for now. *sets phone down*
OH YEAH, WEATHER.

Ridiculous.

In any case, I don't have much to report on today, but I don't want my blog to almost-instantly become a barren wasteland.
Again.


I do have a number of projects going right now.
A picnic blanket that I've been working on for a few years now (I'm just so slow, I guess. Plus it's huge).
A bath mat (my cat puked on my last one, and it had a rubberized bottom so I couldn't clean it).
Some gifts for family members are in the planning stage, as well as favours for my wedding party next month.
A birthday gift that I owe my sister from January (oops).

I guess that's all I can think of right now. It feels like a lot, though.
I haven't made anything for myself in forever. Such sorrow. 

ANYWAY every once in a while I get a little antsy about my WIPs (there are many....), so I decided that I'm going to FROG a few of them. I decided to start with the largest one - a massive pastel rainbow granny square blanket.


This is the Duffle of Doom which once held this blanket. I've avoided dealing with it for years, but it's finally time.


When I say this blanket is big, I really mean it. At the time of frogging, it was about 64" square. And I had only made it through a small portion of the orange. Had I kept going, it probably would have been around 84" square or so.
No one needs a blanket that large. 
No one.
I blame myself, of course. I completely mismeasured what I was doing, and didn't realize it until I had finished the yellow off. I tried to keep going and convince myself that I would indeed use a huge pastel rainbow blanket, but then I couldn't keep up that charade anymore and stopped working on it. So finally I'll have this yarn back for.... other things, I guess. I don't know I don't really have a plan.
BUT THAT'S WHAT MAKES IT FUN.

So I pulled and pulled and pulled and pulled. It took hours
I ended up with really big balls.


THE SHEER SIZE. 


Now, of course, I have a rainbow of yarn and no real ideas what to do with it. I could always save it until I need it, or I could make a MUCH smaller rainbow baby blanket or something, then wait until I need the finished product. 
I mean, it's going to have to wait one way or the other. I have other things to make first! 
If you have any good ideas/patterns/advice, I'd gladly welcome it!

Side note: I'm not good at taking breaks when I craft. This often leads to repetitive stress injuries in my hands, wrists, and elbows. I'm pretty sure that nothing is more embarrassing than saying you hurt your hand crocheting. 
Of course, with such a huge project, I didn't take a break from frogging either, and this was the result:


My wrist was in so much pain the day after, that I had to wrap an ice pack around it for much of the night. 
Lesson learned?
Probably not.

Until next time! Same bat time, same bat channel!

P.S. HAPPY PRIDE!!!!! I am so happy about the latest SCOTUS ruling!!!!!!

Saturday, June 20, 2015

Stitching on Canvas and New Beginnings

I moved today.
Well, I mean I moved my blog. 
I used to have a Wordpress blog. Don't get me wrong - I liked it a lot. Wordpress is easy to use. But I figured it'd be a good idea to get to know how to use as many Google products as I can. 
Employers like diversity in computer skills. :-)
So this is my first post using Blogger. Exciting! Eventually I'll also be able to customize this blog so that it looks amazing. Baby steps. 
So much has happened since my last blog (which, I realize, I hadn't even updated since 2013).
I graduated from college with a BA in Classical Civilizations. 
I got married three days ago to the man I've been dating for 5 years (and engaged to for 2). 
I've begun volunteering at my local Science Museum (and I LOVE IT). I'm also trying to get a job there, since it's the organization that I most respect and admire. 
A few friends and I started our own monthly knitting group, where we get together to craft and chat.
And - as always - I've been crocheting, knitting, sewing, and crafting my little hands off. 
So I figured I'd share one of my most recent crafts! I cross stitched this awesome pattern onto canvas for my mom as a belated Mother's Day gift. She loves Godzilla, so I knew the second I saw this pattern on Pinterest that it would be perfect for her.
This is going to be one of my "tutorials" that is more of a "how I did it." I'm sure I'm not the first one to embroider canvas, so I don't want to take credit for a technique that I'm probably not the first to do.
I chose canvas because then I don't need to frame it or anything, since it's already sort of framed. 


Supplies
Stretched canvas. I already had one laying around, waiting for the perfect project. I'm sure I got it at Michael's or JoAnn's or something.
Embroidery floss. Again, I had mine already. I don't mark my colours, so I don't know what exact ones I used, but I'm pretty sure they were DMC thread.
Sewing needle. Use the one with the thinnest eye that you can.
Pin. Preferably one with a large ball at the end, for your own comfort. 
Cross stitch pattern (printed). Make sure that it's the right size for your canvas, and that the pattern doesn't go over the wood on the back of the canvas - you can't sew where the wood is.
Scotch tape

Steps
**If you want to paint your canvas, do it first.**
1. Start by taping your pattern onto the canvas. The tape may not stick super well, but that's kind of a good thing.


2. Everywhere you would normally be stitching, poke a hole with your pin.


Poke poke poke poke poke....
This part takes forever, and it tired my hands out. Be sure to take breaks if you need it!


Getting there.....
Unless you're a super-perfectionist, your grid probably won't be perfect (just like you can see on mine in the middle in the bottom row. Whoops). Don't fret too much about that - you can't really tell once you stitch it. Plus, I always think that imperfections add a kind of charm to handmade items. 

3.  Once you're all done poking, remove the paper pattern and either take the tape off of it or tape it to a scrap piece of paper. This is your key.


(I didn't paint the canvas - it's just shadowed.)
All the poking is done! Hooray!

4. Start stitching! 
Do be kind of careful, since if you accidentally make a hole in the canvas, it doesn't fix itself as it would in normal fabric. 


Again, you can see that the lines that my stitches are on are a bit off, but....


....once you get further, you can't even tell! 
I split my embroidery floss into threes instead of twos for a bit thicker colour. I considered doing all six threads, but since this canvas isn't forgiving, I didn't want the holes to get too large. 

Stitch until you're all done!!


It looks so great! So exciting! My mom loved it (and everyone I've shown is jealous)! 

If you embroider something onto canvas using this tutorial, I'd love to see it!! 

Until next time!

Monday, August 26, 2013

DIY Earring Upcycle (or How I Turned One Pair of Earrings into Two)

Hi there! It's been so long, I know. I don't like posting unless I have something to say/show off, and this summer has been fairly uneventful as far as crafting goes.

I finally moved out of my awful apartment to a beautiful one in the city. It's so exciting - Dave and I just love it! I love being within walking distance of SO many new shops and restaurants (not to mention a YARN SHOP!!). Other than that and getting ready for school, I really haven't been up to much. Dave told me to relax this summer - it's probably the last summer I'll ever have off.

I feel like I wasted it.

Oh well!

In any case, let me tell you the story of my night. Currently, my area is in a drastic, unseasonal heat wave. It's late August - time for fall to start showing up (which I was all excited for, since autumn is definitely my favourite season), but our heat index has been passing 100 degrees F for two days now, and it won't cool off much for another few days at least. To top that off, the only window that will fit an air conditioner in my new apartment is in our kitchen.... waaaaaaaaaay at the opposite end of the apartment as our bedroom. So this means that our bedroom and bathroom are broiling day and night, and our air conditioner (which really doesn't work that well in the first place) only cools the kitchen and a little bit of the living room. This means we're hot and sticky 100% of the time we're home. Joyous.

So I've been trying to take my mind off the heat by crafting. Those of you who have spent days in a 90+ degree apartment know that your brain doesn't always work as well as it normally does, so I've actually spent most of my time on Pinterest looking for inspiration. As with YouTube, one thing on Pinterest leads to another, and soon I was looking for ideas for an outfit to wear to my first day of school next week.

(Side note: This semester is going to be my BEST EVER. I'm actually taking classes that I enjoy and will be useful to me later on when I'm studying to be an Egyptologist. SO EXCITED!!)

I've fallen in love with boho style a little bit this summer, especially the stacking bracelets. Dave got me one bracelet at the Festival of Nations, and one of my dearest students got me a GORGEOUS one (which is actually three put together) as an end of the year gift after my last recital with the dance studio this past June. (Side note again: Seriously, she is an amazing girl. I miss teaching her so much - her attitude, her enthusiasm for ballet, her sense of humour.... She's the best. ^^) I have been wearing both of those bracelets almost every day for the past week or so. I just love them!!

So I was looking up different ways to incorporate boho style more into my wardrobe on the cheap (or even better, the DIY), and I discovered that I LOVE tassel earrings. They are so cute! So I pawed through my jewelry box looking for inspiration, and I found them. They were absolutely perfect for my purposes. See, this same student also gifted me with gorgeous earrings (because she's so sweet).

Aren't they lovely?
Aren't they lovely?

I realized the top of the earrings would be so perfect for tassel earrings, so I decided to get to work to turn these earrings into ones that I could wear twice as often. :-)

Title
*NOTE* This isn't really a tutorial, more of a "How I Did It," since I don't know the mechanics of any earrings you would want to upcycle.

First, the tassel earrings.

I used DMC embroidery floss to make my tassel, as I had a bunch of it and I like how it's a little pearly, like the earrings themselves. :-)

I didn't know whether to match the little blue pearls or the deep blue gems.

Next, I CAREFULLY opened the jump rings holding the pieces together. I used needle nose pliers that I found in my toolbox. I'm sure this part (and other parts) would have been much easier if I had had the proper jewelry-making tools. But I don't.

This was as precise as I could be with these big ol' pliers.

Then came the tassels. I haven't made tassels since I was like 8 years old making them out of my mom's scrap purple yarn. They're a lot harder to do than I remember. I'm sure back then I didn't care as much how they turned out.

I made my cardboard frame-thing, wrapped my floss around it ten times, and hooked the jump ring and the earring's top around the middle (where one would normally tie it). Closing the jump ring was a chore because all I had to use were those big honkin' pliers. Again, I'm sure it'd be much simpler if you have the right tools.

It was harder than it looks.

After sliding the thread off of the cardboard, I knotted it with a long piece of coordinating string (though I have seen tassels made with a different colour string wrapping around the top, and they are CUTE).

Again, harder than it looks.

Then came the wrapping part. This also came with a lot of loud cursing, as I couldn't seem to get it right. However, I was also too stubborn to look up a tutorial on how to easily make tassels, which I'm sure would have helped. So if you're going to do this, look up a tutorial first. This part is frustrating as all get out.

It's worth it, though!

The threads were a little kinky.

As you can see, they were a little uneven after I cut them, so I straightened the threads using a damp towel, then trimmed the ends to be a little more uniform (but not perfect).

Ta da! So pretty!
Ta da! So pretty!

Now for the other pair.

I'm not as happy with this pair just yet. It didn't come out exactly how I'd hoped, but I think I may know how to fix it.

First, I grabbed a set of earrings I knew I'd never wear again.

So I guess this post is technically how I revamped two pairs of earrings....

I pushed them into a pincushion and painted them to coordinate with the earrings with nail polish. It took two coats.

If you do this, you could just as easily use new posts or stud earrings that already coordinate.

After they were dry, I simply put them through the holes that once connected the bottom half to the jump rings.

So simple!

That's pretty much it. I don't like how they look against the earring bottom, though, so I think I'm just going to look for stud earrings that match the bottom half, then glue them together. Or I could just leave them unglued, and I'd always have the option of returning the earrings back to the way they were in the beginning. :-) (EDIT: Now that I think of it, maybe I'll just get a long, gold chain and make one of them into a necklace! Then I'll have an earring/pendant set!)

Dang, those are gorgeous bottoms.

So that's how I did it. Super simple! I can't wait to wear them to school!!

Love!!!

Until next time!! Stay cool!