HAPPY INDEPENDENCE DAY!!
And to my beautiful neighbours to the north:
HAPPY (belated) CANADA DAY!!
I hope everyone has stayed safe but still partied their little patriotic hearts out!! I'm currently writing this while I listen to the fireworks that have been going off in my city for at least five hours (who starts shooting fireworks in daylight?!). My apartment is starting to smell a little bit sulphurous (all my windows are open since I don't have AC), and my head is starting to hurt, but what're you gonna do? My kitties are a little stressed out, but they're making do. Here's sending good thoughts to your own pets (if you have them) - fireworks can be so stressful for animals.
Poor little guys.
Anyways, I have lots of things to report, including a little tutorial!
First, I want you to look at my knitting bag, because it makes me laugh all the time.
My mom and I went to an estate sale a few months back, and I laughed so hard at this that she bought it for me.
The best part is it's machine embroidered, so someone programmed a kangaroo sitting on knitting needles into their embroidery machine.
Beautiful. I just love it.
Second, I finally got something that I've been wanting and searching for for months.
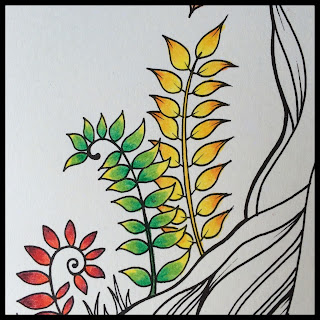
Amazon is sold out of Johanna Basford's two colouring books every single time I look, and it was getting so frustrating. I finally walked by them at Barnes and Noble, though. I considered buying her other book (Secret Garden), but it seems to have more of an activity book-feel to it (there are several pages where it tells you to complete the drawings, and I'm just not comfortable enough with my art skills). This one is almost strictly colouring, and I LOVE it!! I've honestly been carrying it everywhere. My husband ran a 25k this morning (SO PROUD OF HIM), and I took this to the race and coloured while he ran. I even pulled out my Prismacolors from high school and was playing with those.
I love blending.
I will need some new coloured pencils soon, but everything I've been reading about Prismacolors since they started being manufactured in Mexico is pretty bad, so I may have to find a new brand. Any suggestions would be really helpful!!
If you're interested in what people do with some of the pictures in Johanna Basford's books, I'd recommend searching just her name on Pinterest - people have done some really amazing things with her pictures!! They're so inspirational, even if I know I'll never make it to that level.
Okay, now the moment you've all been waiting for, I'm sure. The tutorial.
I finally finished my crochet bath mat.
But bath mats are like $5 - why wouldn't you just buy one?
Good question! I don't like the bath mats you buy at the store because of their rubberized bottoms. That means that you can't wash it well in the washing machine, and it gets all mouldy and gross. I hate them so much. Plus my cat barfed on my last one, and so I've just been using a towel on the floor like a bachelor.
So I decided that if I just crochet my own out of cotton yarn, I could machine wash it as much as I want!
*Note: I actually have yet to machine wash it, so I don't know how it's going to work out. But I'm optimistic.*
Let's do this.
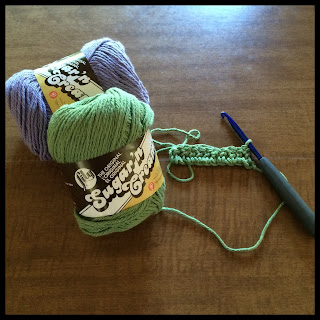
So I used a little less than four full balls of each colour of my cotton yarn. It's the 70.9g balls of Lily Sugar'n Cream yarn, and I'm pretty sure I got mine for really cheap at Michael's. The green colour I used is called "Sage Green," and the purple is "Hot Purple." What a weird colour name.
My husband and I couldn't agree on the colours, so I just picked my favourite colour (purple) and his (green) and went with it. They actually look really nice together.
You'll also need another ball for the border, but whether that's one of your main colours or a different one is up to you. I used a cream scrap cotton.
So I learned something about myself while I made this bath mat.
Apparently, I'm not very good at following my own patterns.
I thought I had all the measurements and everything down, but it all turned out wonky in the end. If you're trying to do this, I would go with the measurements system instead of the row counting one - I went with the latter, and, like I said, I don't know where I went wrong, but I definitely messed up.
My goal was to make a bath mat that measured 27" x 18". I decided which colour would be my length strips (purple), and which would be my width (green). I made 6 purple strips that measured 3" x 27", and 9 green strips that measured 3" x 18". In the end, I only used 8 of the 9 green strips, but the mat still measured out to be 27" x 19.5". I don't know - if you do this just be flexible and remember that frogging is always an option (as per my last post).
I double crocheted my strips (for speed), but you could certainly knit them or do a fancier stitch (I'm considering making a rug in a puff stitch because I think that would feel so good to walk on, but it would also use up A LOT of yarn).
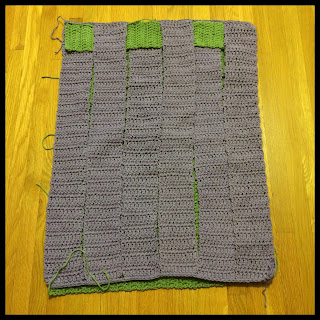
Once I had all my strips done, I connected them by just single crocheting the ends together, as you can see in the picture. I connected all the purple strips at both ends, but the green only at one end (it actually made the weaving part easier, I think).
Once all that's done, I placed my long strips on top of my short ones.
Hooray for weaving!
Don't worry if the strips get a little scrunched (like my bottom row). Once they're all secured you can fix that really easily.
After I finished weaving, I single crocheted the open end of the green strips together. This part was a little tricky, but certainly not the worst thing I've ever crocheted.
Once all that was done, I just took my cream scrap cotton yarn and single crocheted a border, going through both layers - the green and the purple - in order to secure them together. It doesn't look the prettiest, but I've always been more of a fan of functionality over looks in my crochet (which is really just my justification for not being very good, haha). If you wanted, you could do a fancy scalloped border or something - that would look cute. :-)
Once the border was done and I weaved in the last of my ends (which took no time at all, since I'm a big proponent of just crocheting on top of the ends), the mat was ready!
It's very absorbent, but also a little slow to dry, so be warned. Although, with it looking this cute, you could always hang it out on the line in the summertime and dry it faster (and the sun will help keep it clean, as well!).
My husband likes it - he said it looked too good to step on.
I told him that I worked too hard on it for it not to be stepped on.
Once I machine wash it (probably this weekend) I'll report back on how it held up. There's always that fear that it'll all come apart in the wash (at least I have that fear). So until then, celebrate the summer holidays safely!


