Showing posts with label Embroidery. Show all posts

Saturday, June 20, 2015

Stitching on Canvas and New Beginnings

I moved today.
Well, I mean I moved my blog. 
I used to have a Wordpress blog. Don't get me wrong - I liked it a lot. Wordpress is easy to use. But I figured it'd be a good idea to get to know how to use as many Google products as I can. 
Employers like diversity in computer skills. :-)
So this is my first post using Blogger. Exciting! Eventually I'll also be able to customize this blog so that it looks amazing. Baby steps. 
So much has happened since my last blog (which, I realize, I hadn't even updated since 2013).
I graduated from college with a BA in Classical Civilizations. 
I got married three days ago to the man I've been dating for 5 years (and engaged to for 2). 
I've begun volunteering at my local Science Museum (and I LOVE IT). I'm also trying to get a job there, since it's the organization that I most respect and admire. 
A few friends and I started our own monthly knitting group, where we get together to craft and chat.
And - as always - I've been crocheting, knitting, sewing, and crafting my little hands off. 
So I figured I'd share one of my most recent crafts! I cross stitched this awesome pattern onto canvas for my mom as a belated Mother's Day gift. She loves Godzilla, so I knew the second I saw this pattern on Pinterest that it would be perfect for her.
This is going to be one of my "tutorials" that is more of a "how I did it." I'm sure I'm not the first one to embroider canvas, so I don't want to take credit for a technique that I'm probably not the first to do.
I chose canvas because then I don't need to frame it or anything, since it's already sort of framed. 


Supplies
Stretched canvas. I already had one laying around, waiting for the perfect project. I'm sure I got it at Michael's or JoAnn's or something.
Embroidery floss. Again, I had mine already. I don't mark my colours, so I don't know what exact ones I used, but I'm pretty sure they were DMC thread.
Sewing needle. Use the one with the thinnest eye that you can.
Pin. Preferably one with a large ball at the end, for your own comfort. 
Cross stitch pattern (printed). Make sure that it's the right size for your canvas, and that the pattern doesn't go over the wood on the back of the canvas - you can't sew where the wood is.
Scotch tape. 

Steps
**If you want to paint your canvas, do it first.**
1. Start by taping your pattern onto the canvas. The tape may not stick super well, but that's kind of a good thing.


2. Everywhere you would normally be stitching, poke a hole with your pin.


Poke poke poke poke poke....
This part takes forever, and it tired my hands out. Be sure to take breaks if you need it!


Getting there.....
Unless you're a super-perfectionist, your grid probably won't be perfect (just like you can see on mine in the middle in the bottom row. Whoops). Don't fret too much about that - you can't really tell once you stitch it. Plus, I always think that imperfections add a kind of charm to handmade items. 

3.  Once you're all done poking, remove the paper pattern and either take the tape off of it or tape it to a scrap piece of paper. This is your key.
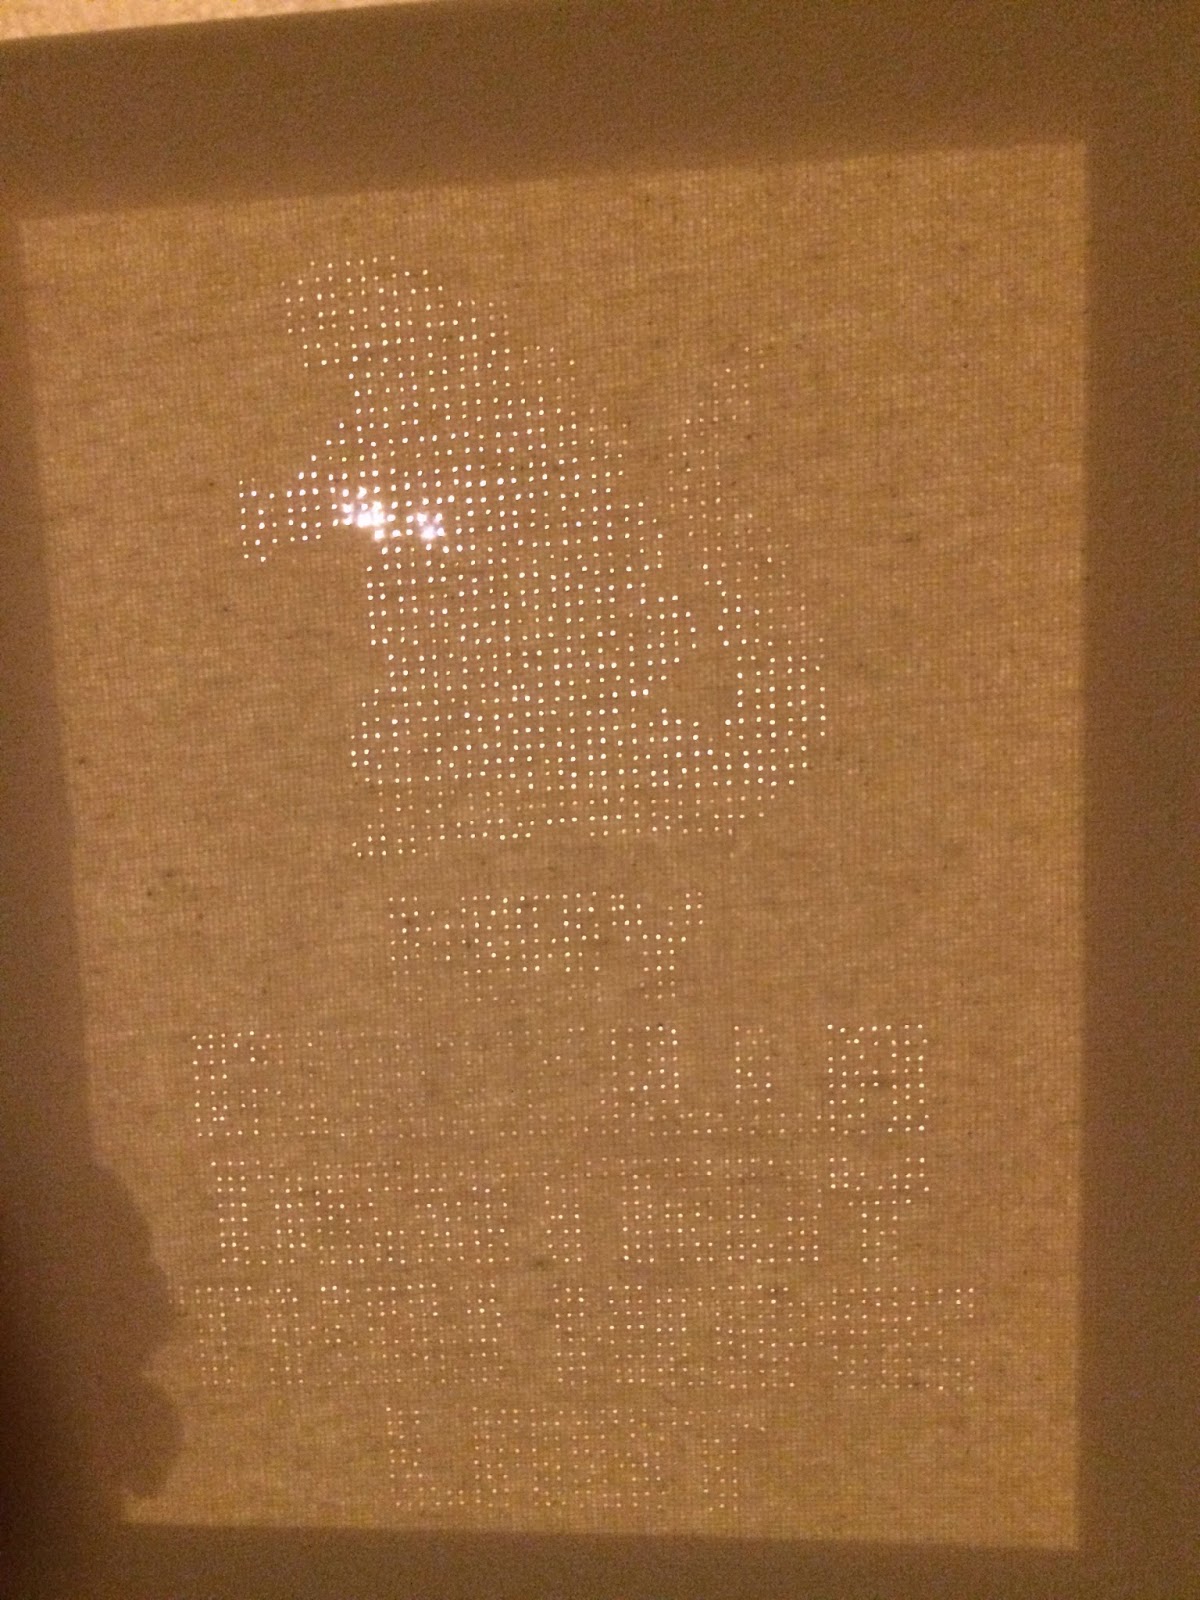

(I didn't paint the canvas - it's just shadowed.)
All the poking is done! Hooray!

4. Start stitching! 
Do be kind of careful, since if you accidentally make a hole in the canvas, it doesn't fix itself as it would in normal fabric. 


Again, you can see that the lines that my stitches are on are a bit off, but....


....once you get further, you can't even tell! 
I split my embroidery floss into threes instead of twos for a bit thicker colour. I considered doing all six threads, but since this canvas isn't forgiving, I didn't want the holes to get too large. 

Stitch until you're all done!!


It looks so great! So exciting! My mom loved it (and everyone I've shown is jealous)! 

If you embroider something onto canvas using this tutorial, I'd love to see it!! 

Until next time!

Monday, August 6, 2012

DIY Hardcover Needlebook

It's Monday and I'm done with work (hooray!). I have a great big pile of projects that need to get done before Wednesday in front of me (I have 3 projects to start and one to finish), but I like to procrastinate, so.... here we go. :-) I'm sure I'll be just fine. I'll post pictures of them when they are completed, and I might even add a tutorial for one of them. We'll see.

August is a hectic month for me. It is my mom's birthday, my sister-in-law's birthday, my nephew's birthday, my niece's birthday, and Dave's niece's birthday all at once. It's also back to school time, so I have to get all of those crafts started and finished.... Eep! So this year since I'm totally broke they all get handmade gifts - mostly crocheted, because I have a huge stockpile of yarn. If yarn could ever be used as currency I'll be sitting pretty. :-)

In my procrastination, I decided to quickly do my second tutorial. Over the weekend I wanted to make a needlebook (needle book? One word or two?), and as I love hardcover books more than paperback, I decided that my needlebook had to be hardcover as well. It's only right. I will admit, the pins and needles are a little trickier to get into the felt, but it's so cute that it's totally worth it. This project took me a long time to make, but I had to work out the measurements and kinks, so it will probably take you less time. I also hand-sewed the entire thing, so if you decide to use a sewing machine it will take no time at all.

Feel free to leave a comment or email me at littlecraftyfox@gmail.com if you have any questions! Keep in mind I am fairly new to the photo tutorial world, so any helpful hints you may have would be fabulous! I apologize in advance for the poor photo quality. I'm not a photographer (obviously). :-)

So here we go!

First let's look at the supplies you'll need....

1. An old cardboard binder (I have been madly in hate with this one for so long. Finally I get to get it out of my house).

2. Felt. You'll need two rectangles that measure 6" x 9.25" each. (Have you seen the cool patterned felt they have out there now?? Possibilities are endless!)

3. Ribbon to match your felty colour scheme.

4. Scissors (of course).

*Not pictured (mostly because I'm lazy)*

5. Needle and thread (Easily thread the needle using your handy-dandy Wine Cork Needle Threader! :-P)

6. Any embellishments you would like (fabric paint, buttons, embroidery floss, etc).

**I had all this stuff on hand, so total cost for me was $0!!**

Let's get started!


1. Cut one of the covers off of your binder. This can be a little tricky since the cardboard is thick, so you may want to use something stronger than scissors.

2. Cut two rectangles that measure 3.75" x 5". Set them aside.

3. Cut 21" of ribbon and stitch it onto the felt you are going to use as the outside cover of your needlebook (or I suppose you could glue it). Make sure you match up the middle of your ribbon with the middle of your felt so that the extra ribbon is even.

4. Embellish the cover any way you like. You can use felt pieces, embroidery, crochet appliques (like me! I used this pattern to make my flower out of embroidery floss), fabric paint, beads, or pretty much anything else you can think of. Just be certain that you are really happy with how it looks before you continue with the project. Trying to decorate the cover after you continue gets a lot harder (as I discovered).

5. Pin the two pieces right sides out (as in you will not turn them inside-out after you're done stitching) and sew three sides together using either a matching or contrasting thread. I recommend sewing the two sides and top of the felt, leaving the bottom open. I used a basic running stitch.

6. Slide the two cardboard pieces into the felt pocket and stitch up the bottom.

7. You're so close!

**At this point if you would like to add pages to your book now would be the time to do it. Cut felt that is 8.5" x 5.25" and run a quick stitch around the edge. Add pockets, elastic, buttons, pouches, whatever you want to those pages. Then pin it to the inside of your book and do the next step through all layers of felt at once. I was going to put a page in mine, but I'm a beginning embroidery enthusiast, so I don't have many pins and needles that need organizing. :-)

8. Sew along the outside of the cardboard that is inside the felt. This creates a good foldable middle for your book.

9. Fill your book with all manner of pins and needles! (As you can see I wasn't kidding when I said I don't have many pins and needles that I use!) I crocheted another flower and stuck it into the corner of the inside as a little extra bit of happy. :-)

All finished!

Obviously you can see that I tried to decorate my book even more after I had stitched the book together. I had to use fabric paint because I couldn't sew anymore, but I still like it. :-)

If you use this tutorial to make your own, please post a link to the picture of your finished product! I would so love to see it!!

And because I can....

This is my cat Oliver. He loves to hug and play fetch (not kidding). I think it's hilarious that he plays fetch, so I decided to offer some photographic evidence (it's blurry because he wouldn't pose for me). He will play until he gets so tired that he collapses and pants - it's so great. :-)

Enjoy your week!

Saturday, August 4, 2012

DIY Wine Cork Needle Threader (Or My First Tutorial)

Happy Saturday to you! I have the day off today, and Dave is working, so that means I've got lots of free time to work on my projects. Next in line is a needle book. Woo!

Today marks the day I make my very first tutorial. As it is my first, I hope it is clear. I really like the photo tutorials that really walk you through what to do so that I know what I'm doing is right. Please leave a comment and let me know if you like it, what I can change, etc. It would be super helpful!

After I saw this tutorial for a felt needle threader, I decided to try it out for myself (by the way, I'm in love with that website - that girl is amazing). However, after trying it out, I decided I needed a little more solid handle. So after lots of thinking and searching through my desk and junk drawer, I found the perfect thing: the Cupcake wine cork I had been saving for something awesome (though I didn't know what). There was already a hole in it from the corkscrew, so that just made it even more perfect. So exciting! Making this classy needle threader was super easy and took almost no time (if you ignore glue drying time). Enjoy!
**Side note: Apologies for the poor quality photos! D:

*          *          *

Supplies Needed

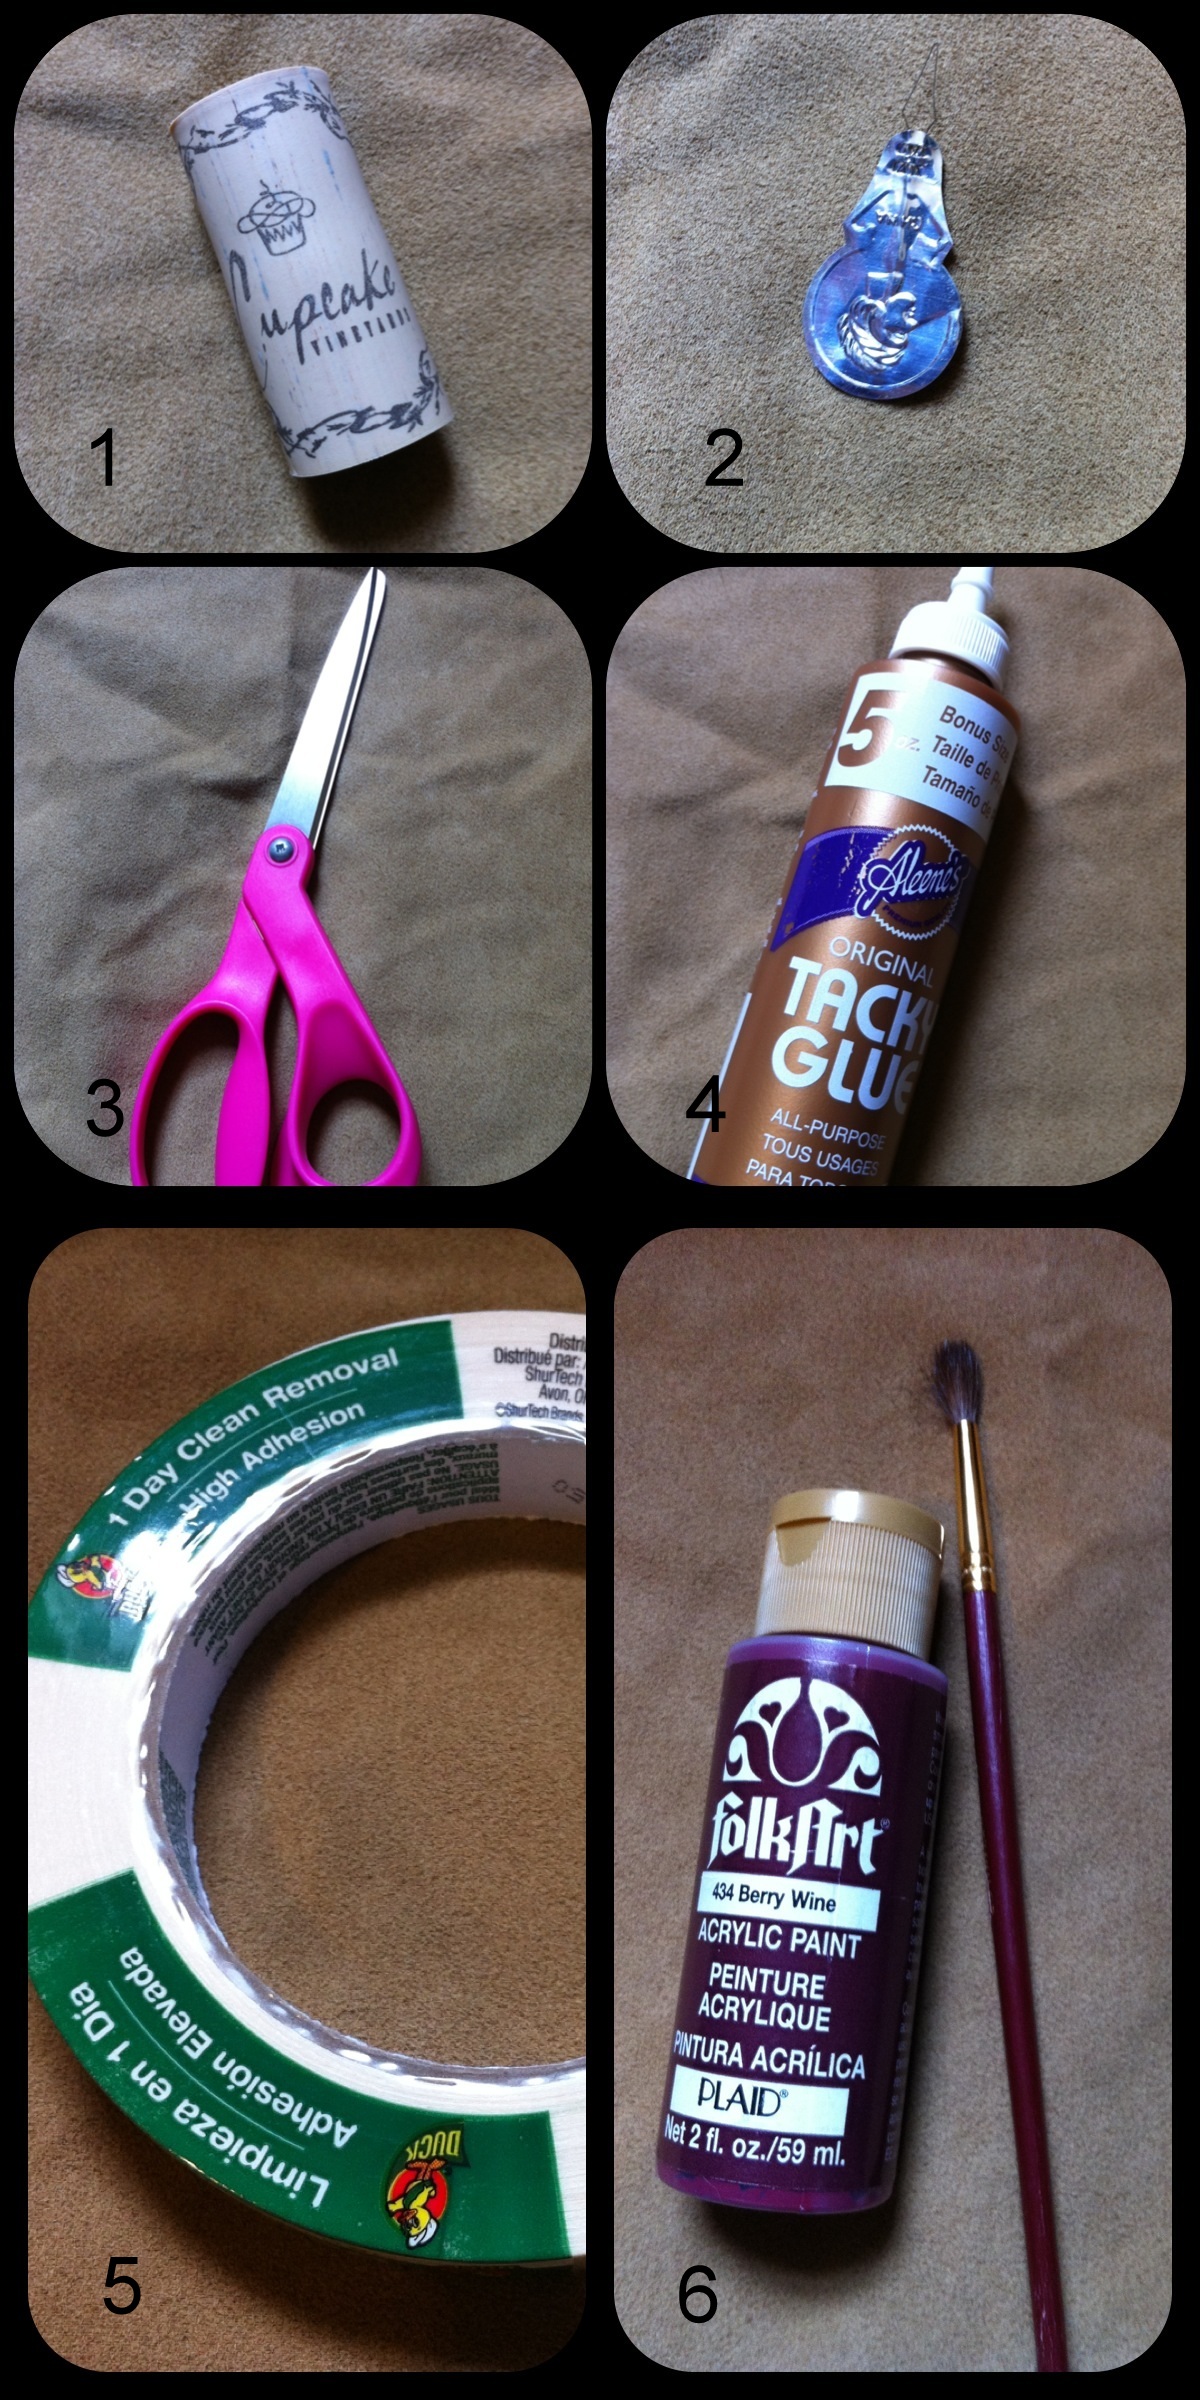
1. Wine Cork

2. Needle Threader

3. Scissors

4. Tacky Glue

5. Masking Tape

6. Paint (Whatever colour you want!)

**I had all these supplies on hand, so total cost was $0!!**

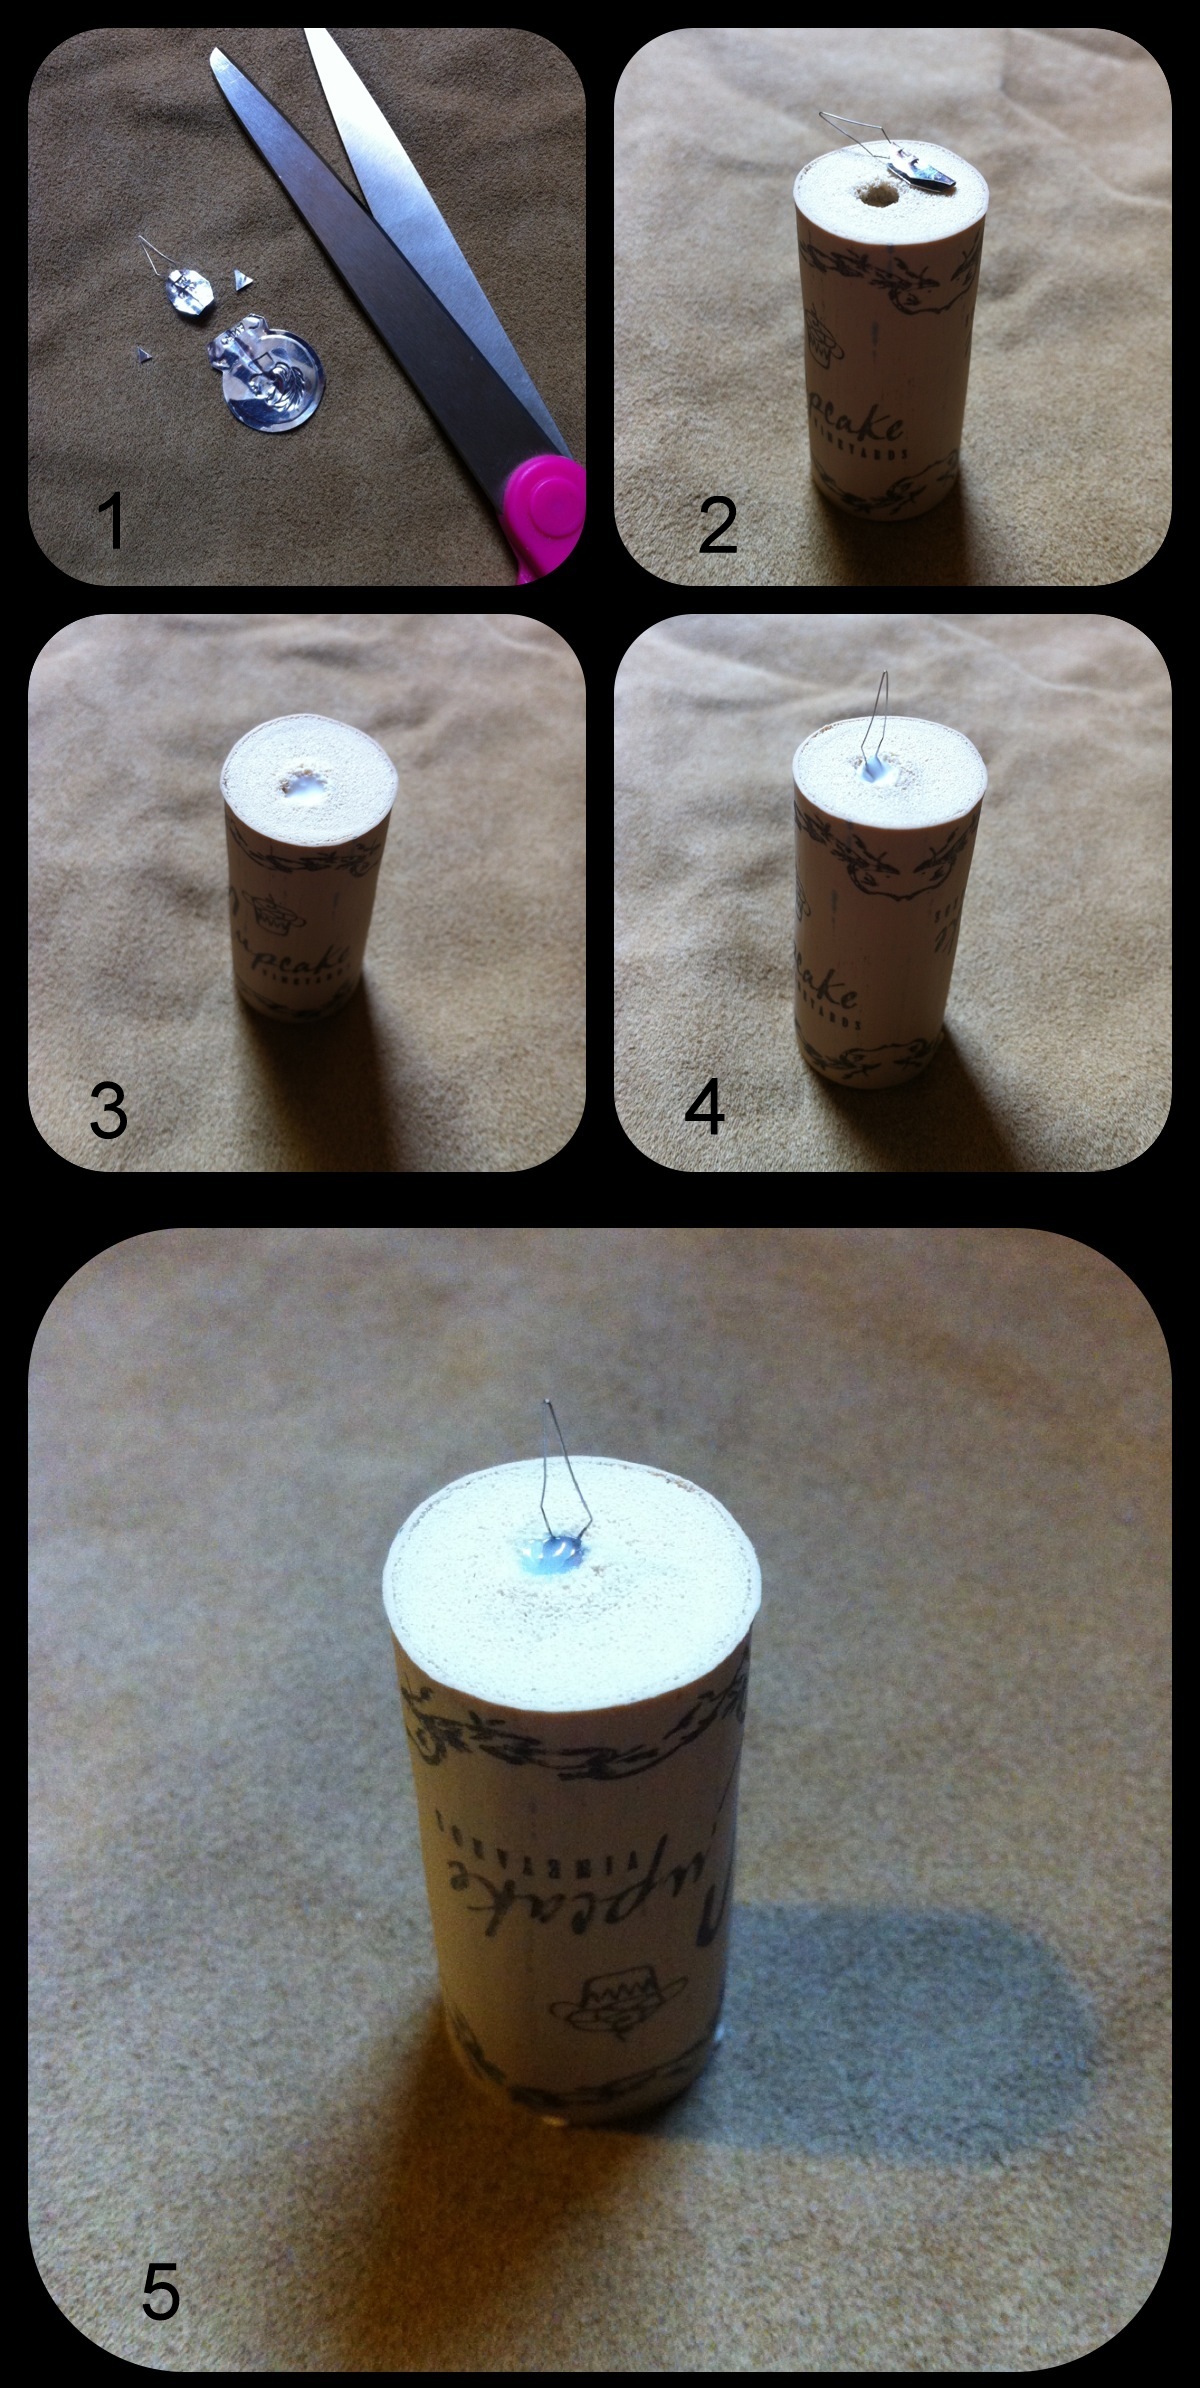
1. Cut the top half of the needle threader off. I also cut the corners off of the bottom just to round it out. NOTE: Don't try to just pull the wire out of the threader. I tried and completely broke it. Luckily I found another threader in my portable sewing kit. Phew!

2. Fold the top of the threader (is it made of aluminum?) in half so it will fit in the hole made by the corkscrew. If there is no hole made by a corkscrew (how did you get it out of the bottle?!), you could always drill one, or if you don't have a drill (like me) you could use a hammer and nail, I suppose. Just please be careful!

3. Fill the hole in the cork with Tacky Glue (or really whatever kind of glue you choose. Tacky Glue has never let me down in the past).

4. Gently push the threader into the hole.

5. Let it dry. Mine took hours to dry - I ended up having to finish it the next morning. To see if the glue was dry I tugged on the wire a little (very gently!) - if there was any give it wasn't ready yet. Also, I found that as it dried, the glue sank down and there was still an indentation. Don't be afraid to put more glue into the hole if you need it - you want it as flush with the top of the cork as possible.

6. After the glue is COMPLETELY dry, use the masking tape and tape off the edge of the cork. It's okay if it isn't perfect, that just makes it individual and special. :-) I decided not to tape off the wire because it is so thin and fragile.

7. Carefully paint an even coat onto the top of the cork. I used Berry Wine from Folk Art - I really love that brand. It seems to come in any colour I need.

8. Let it dry. This only took about an hour. NOTE: I ran my fingernail along the edge of the paint, and it is more than easy to scrape off if you make a mistake. You could always skip this painting part, but I think it looks better painted.

You are finished, my friend!

If you use this tutorial to make your own, please post a link to the picture of your finished product! I would so love to see it!!

Enjoy your weekend!